Lighten up!

For years whenever my husband and I would purchase furniture it seemed we always picked the same dark brown pieces over and over. Now when I look around my house at this sea of “brown”, I want to give it all away and start over.  Knowing that wasn’t going to fly with the husband, over Christmas break I decided I would just start by painting a few pieces.  With Tim home for the holiday, he was adamantly against me painting.  Actually I think he was just against any painting messes.  So as soon as his car left the driveway on the Monday following Christmas break, I quickly grabbed my drop cloths, brushes and paint and got straight to work!

IMG_0134

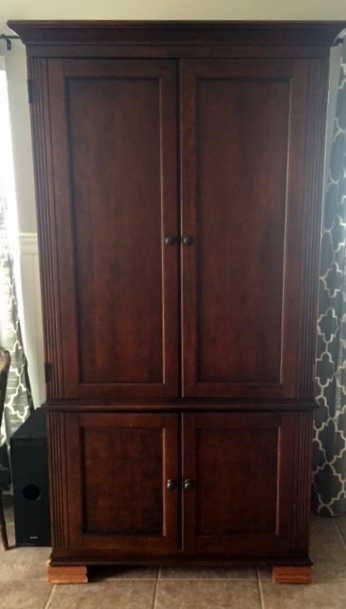
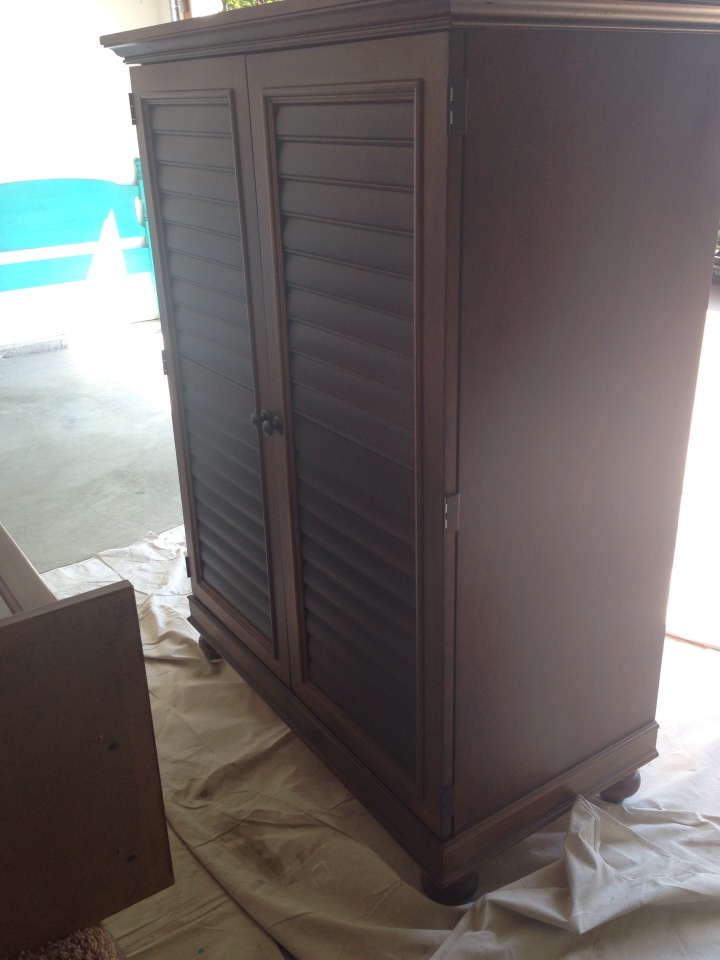
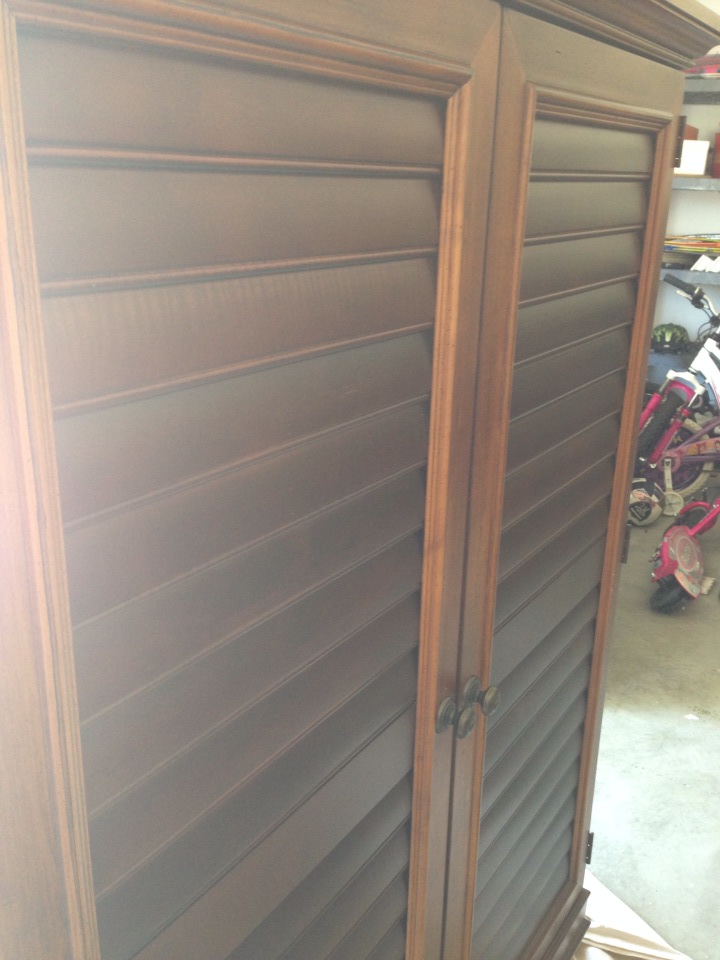
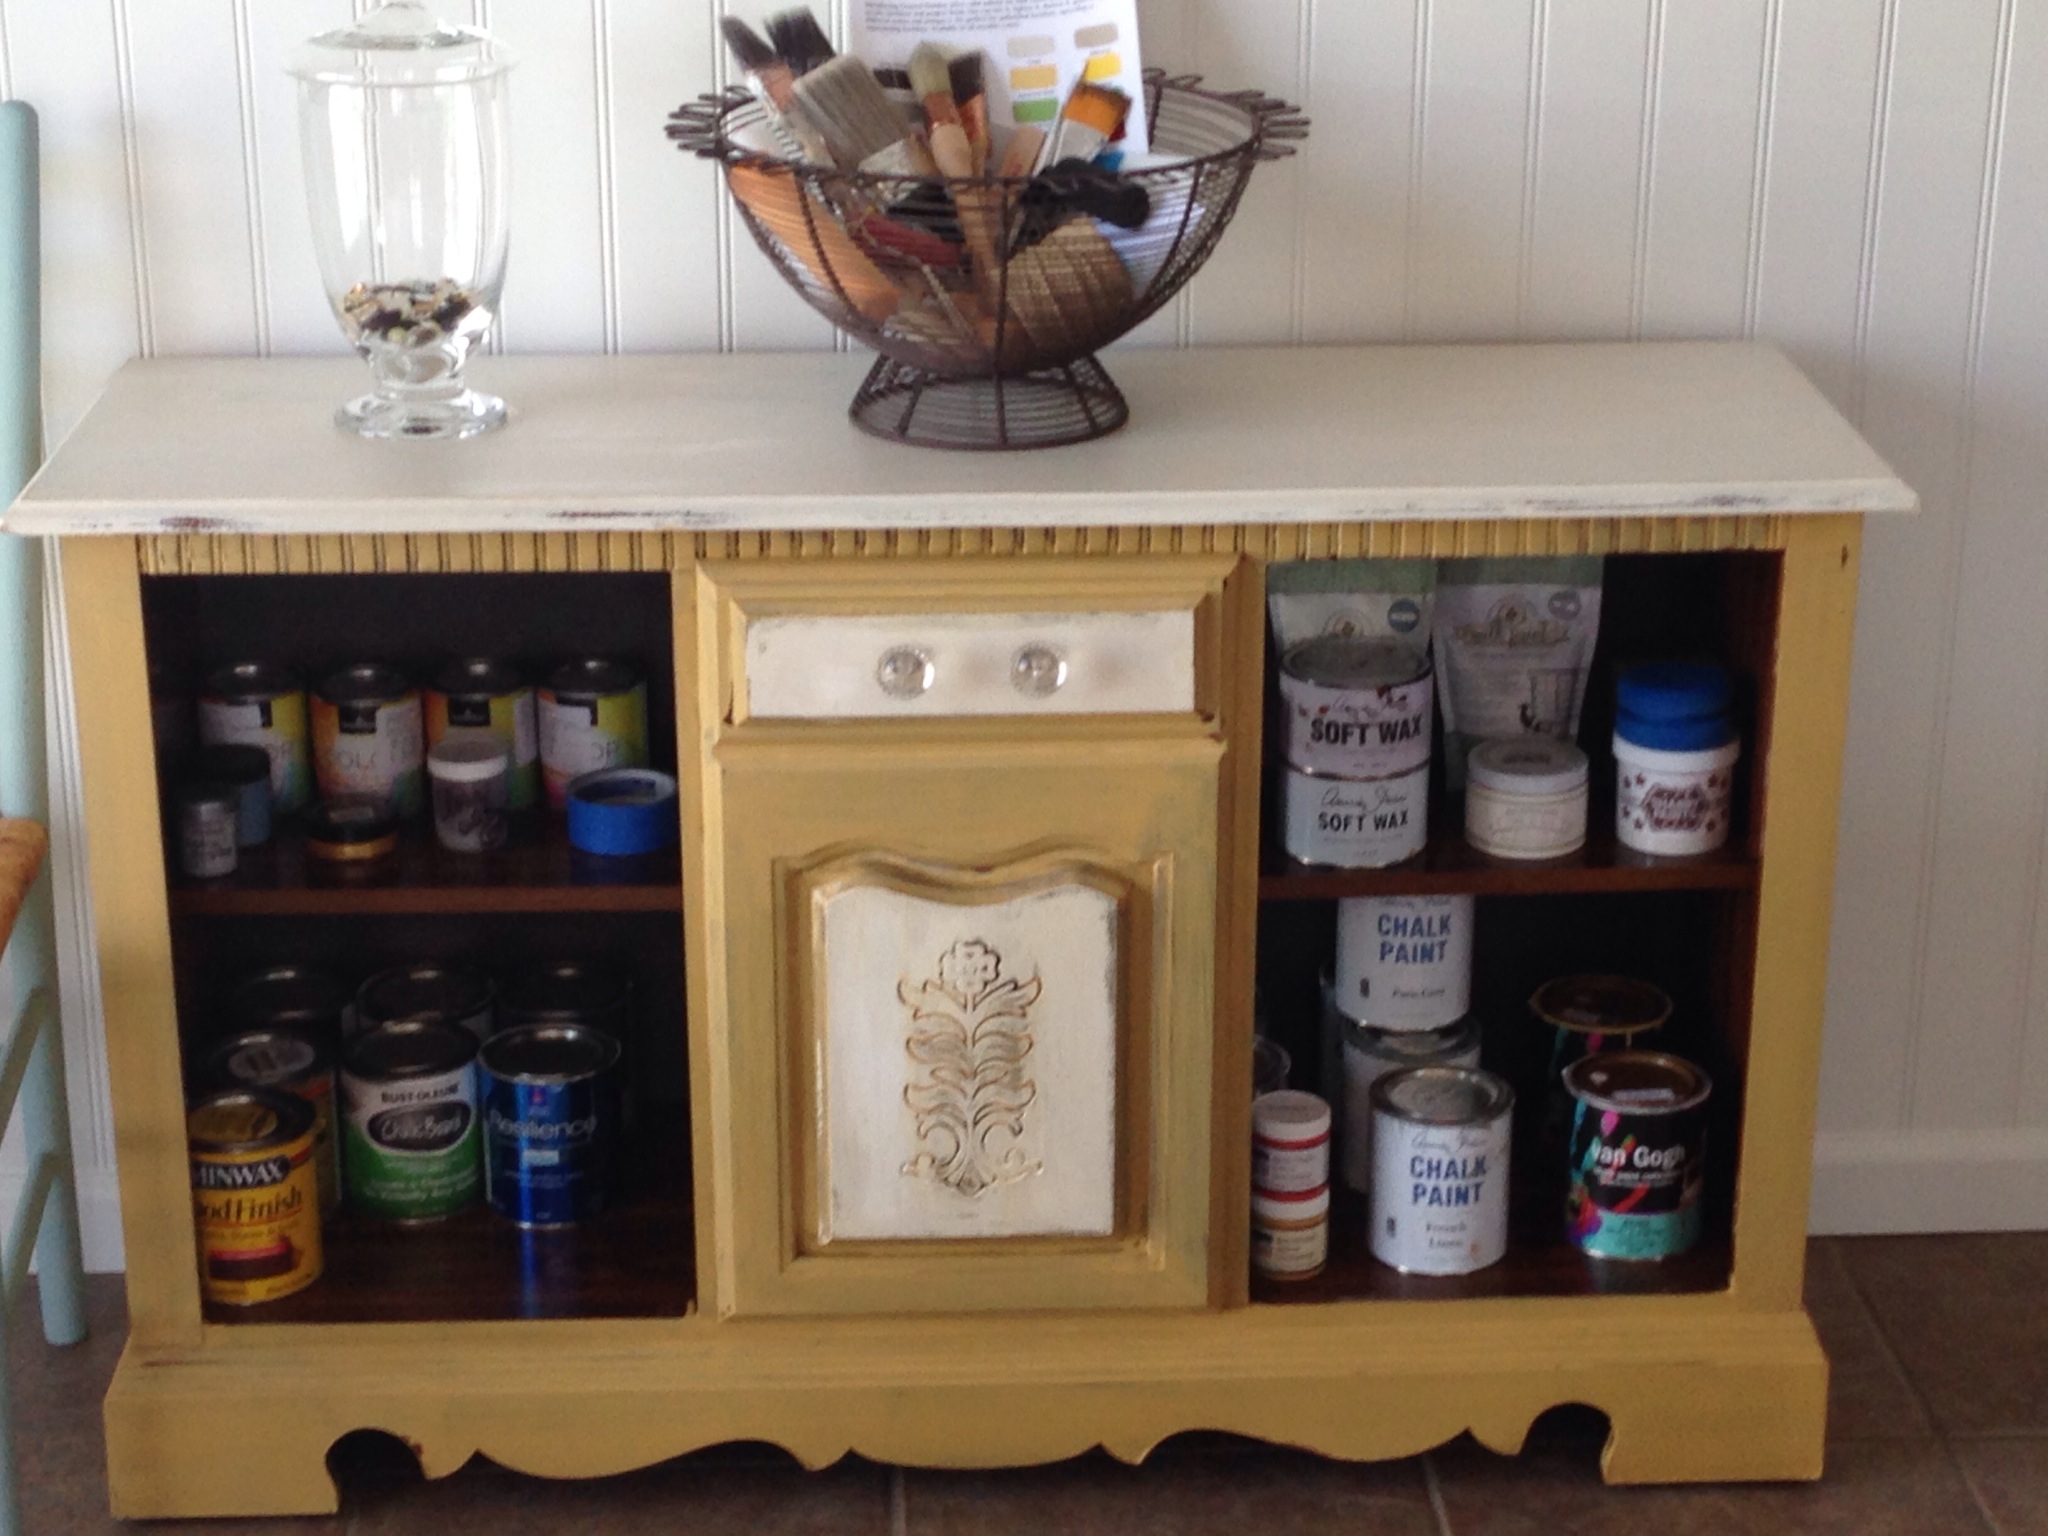
I decided to tackle this armoire that houses our TV in our sunroom. We bought it when we first got married almost 15 years ago so I wasn’t too concerned if it didn’t turn out.  I figured I would just replace it if I screwed it up too badly.  Tim is not that observant so he probably wouldn’t even notice if it happened to be gone the following week.


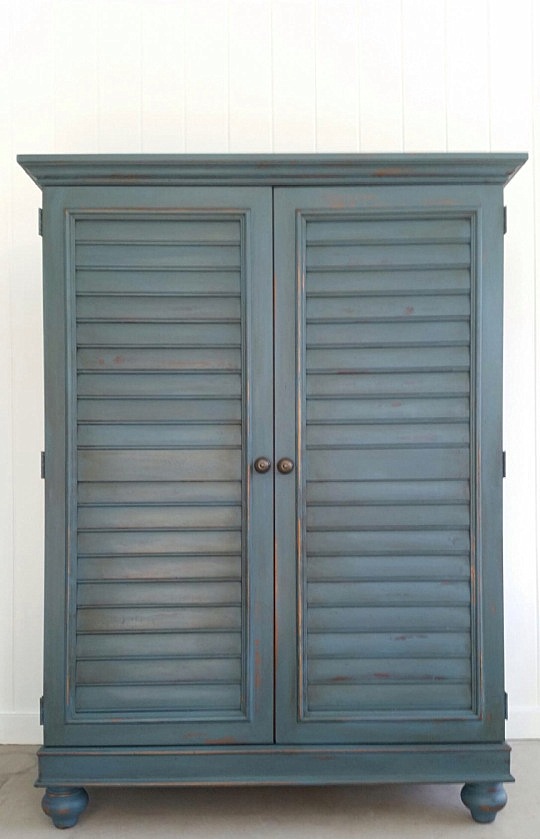
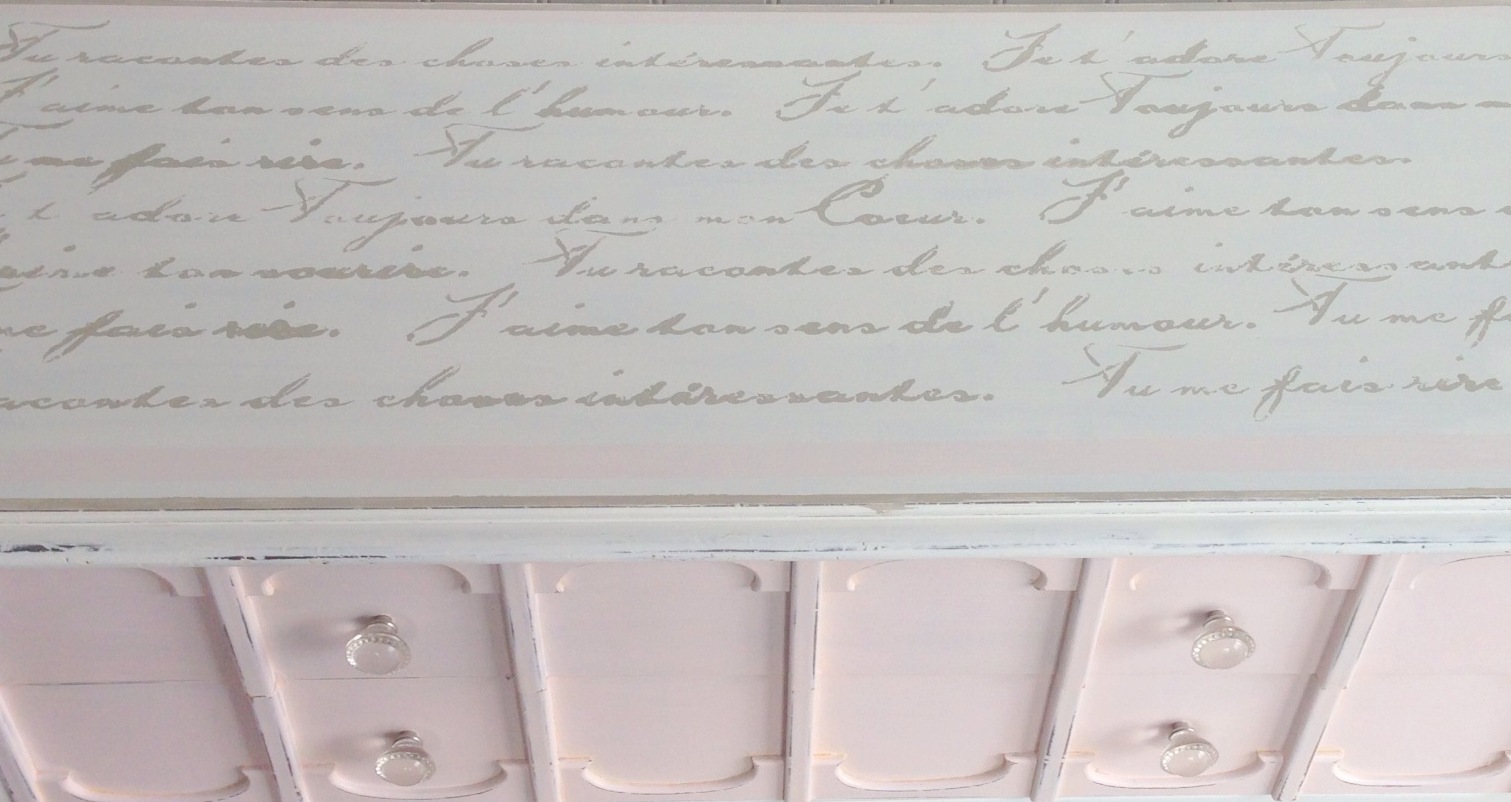
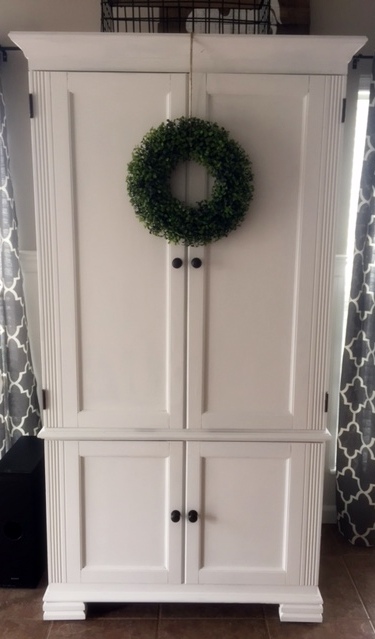
I cleaned it thoroughly because my kids are constantly in and out of it with greasy little hands. After that I applied a coat of Pure White paint by Annie Sloan.  As you can see it is a pretty dark piece so I did apply two more coats of paint, allowing dry time in between applications.  I used Annie Sloan’s clear wax after the last coat of paint had dried.  I sanded only slightly because I didn’t want it to look super distressed but wanted a nice smooth finish.  After sanding and wiping it down with a dry cloth I applied one more coat of clear wax.  This piece of furniture gets a lot of use and I knew it would need some extra protection.

IMG_0138

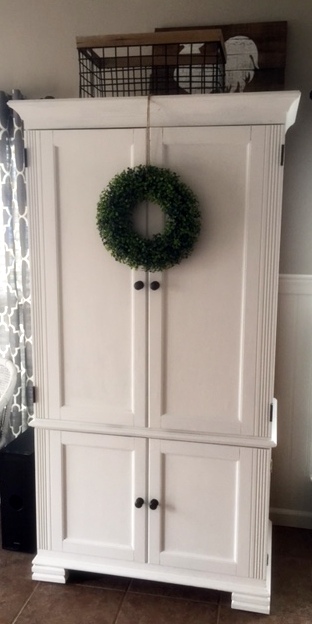
I love how it turned out. It really lightened up the room which was what I was going for.  I am also happy to report that husband loved it as well.  I think he actually liked that he didn’t have to look at the “in progress” stage.  Not to self…..Do whatever you want but have it cleaned before spouse gets home!

A POWERHOUSE lunch that tastes good too!

I always feel healthy after yoga and so for at least a good hour and a half I try to eat clean.  🙂  Today I decided to make a Kale and Quinoa salad.  This salad is filling, good for you and tastes great too. Kale and Quinoa Salad 1 Bunch of Kale (cleaned and de stemmed) 1 cup Quinoa (cooked and cooled) I used Gluten free 1/4 avocado 3 T Extra Virgin Olive Oil (Organic) 2 T Fresh lemon juice 1 t Dijon mustard 1 garlic clove diced salt and pepper to taste Clean and de stem Kale.  Roll Kale leaves and chiffon chop them.  Place chopped kale and about 1/2 cup quinoa in a bowl. In a small bowl mix E.V.O.O., Dijon mustard, lemon juice, garlic, salt and pepper.  Mix well.  Put about 1 T of the dressing on the kale and quinoa mixture.  Top with avocado and chow! I save the extra kale, quinoa, avocado and dressing in separate left over dishes.  I plan on eating this for lunch everyday this week. ENJOY!  Your body will thank you. quin 2

Healthy chicken tacos

I am a die hard Mexican food lover, but it’s just not always the healthiest of choices.  Nevertheless, I need my Mexican fix weekly.  This week I decided to make a healthier version of my favorite food.  I had a million places to be on Monday night so I needed something quick and healthy.  This recipe is easy and was the best chicken taco I have ever had.  I think the salsa is the key.  I used a Frontera Salsa…

2 Chicken Breasts

1 Jar Roasted Habenaro (HOT) salsa – Yes salsa matters!

1 head of green cabbage (thinly shredded)

1 package corn tortillas

Low fat sour cream

Fresh Cilantro

In crockpot combine chicken breasts with entire jar of salsa.  Cook on low for 8 hours or high for 4 hours.

1/2 hour before chicken is done, shred chicken breasts and place back in crockpot.

Assemble

Take 2 corn tortillas and heat in microwave for 20 seconds. (If you want crispy shells you can place the corn tortillas in the oven at 350 degrees for a few minutes.)  Spread a dollop of sour cream on the top tortilla shell.  Place shredded chicken on top of shell.  Top with shredded cabbage and cilantro.  Pick up and chow!

photo 2

The two corn tortilla shells are key!  Otherwise  you can’t pick them up to eat…..they will just fall apart:(

photo 3

This recipe is a keeper!  I am telling you…..soooooo good!

General Finishes Antique White Buffet

My dear friend Deana has been looking tirelessly for a buffet to go in her breakfast room.  She found this gem on craigslist finally and sent me an inspiration picture of what she wanted it to look like.  She was looking for a white or off white color to accent her grey walls.  She didn’t want anything too ornate or fancy.  This buffet was perfect but needed a little face lift.

10711890_10203387941033111_1624451112_o 10686303_10203387944113188_473587128_o

I first started by giving taking off all the hardware and giving the whole buffet a light sanding.  Next I cleaned the piece off with equal parts alcohol and water.  Once all the dust was off and the buffet was dry I applied a coat of General Finishes Antique White.  This paint is awesome if you are looking for a really smooth finish.  It goes on so smooth and dries quickly.  After I applied a coat of paint, I lightly sanded the buffet again and cleaned off with a dry rag.  I repeated the process three times.  After the final coat of paint had dried, I lightly sanded the edges just to give a little depth to the piece.

Deanna also wanted the hardware to be darker.  I found this rubbed bronze spray paint at Lowe’s that did just the trick.  I cleaned the hardware and then sprayed three times, allowing for dry time in between each coat.

10412276_10203413174983944_945116607_o 10677277_10203414355813464_1350155722_o 10707458_10203414889346802_166924929_o

I am loving the buffet and thinking about keeping it and changing my phone number.

Deana Buffet 3 Deana Buffet 2 Deana buffet 1 Deana buffet 4

Armoire makeover for outdoor patio using Annie Sloan chalk paint

My sweet friend Katie H. asked me if I would transform a beautiful armoire belonging to her mother, Gail.  Gail was looking for a piece that she could place outdoors under her covered patio where she could store things, such as candles, pool supplies, etc.  Katie and Gail found this piece and wanted it to be painted in a rustic way and chose Flow Blue by Miss Mustard Seed.

10656258_10203269755838555_2139919074_n10621870_10203270609659900_481990150_n

Miss Mustard Seed makes a great milk paint that peels in certain places giving it a really natural old feel to the piece.  If you use a bonding agent in combination with the paint you will not get any of the peeling.  I mixed the paint and knew I would have to add the bonding agent because this piece was so shiny.  I applied the first coat and then waited for it to dry.  Upon returning I found this…..

10615661_10203270564858780_1653109738_n

10681991_10203270564378768_968914408_n

Insert SCREAM here!

Some things milk paint will just not adhere too.  I made an executive decision and scraped off all the paint.  Then I slightly sanded the piece.  I had to go with my old standby, which I know will stick to ANY surface….Annie Sloan Chalk Paint.  I chose a similar color to the Flow Blue called Aubusson Blue.  It is a gorgeous color.  I applied two coats allowing for dry time in between. Next I added a dark wax to age the piece and sanded off certain areas.  When finished I wiped the whole piece down and added two coats of Shabby Paints Vax!  This stuff is AWESOME.  No buffing required.

10656110_10203297881621682_1838918694_n 10574708_10203297881141670_573157697_n (2)

Katie and her husband Ron came and picked it up today.  I was dying to know what Gail thought.  Katie sent me a picture of the armoir in its new home and Gail texted me, “It’s beautiful.  I absolutely love it!!  Thanks so much!!!”  Whew, another happy customer and another lesson learned…..not all paints are created equal!

10695393_10203298458196096_794151163_n (1)


Annie Sloan updated settee

I found this awesome settee on craigslist and couldn’t wait to get my hands on it.  I have to say it wasn’t much to look at when I saw it.  I knew with some Annie Sloan chalk paint, she could beautiful once again.

settee old

I applied two coats of Annie Sloan Pure White to the entire settee.  Once dried I sanded to distress and then applied my favorite wax mixture.  I used 1 part Annie Sloan Dark Wax to 2 parts Mineral spirits.  This “waters” down the wax and allows you to brush on the entire piece rather than rubbing the wax on.  I find that it gives it a more realistic aged effect.  Afterwards you simple take a lint free cloth and wipe the wax glaze off.  This leaves the finish super smooth.  You will still need to add a protective coat of wax.

Now to reupholster this piece….All I have to say is thank God my Dad was staying with me while he is in transition of moving to Florida.  He sat and removed every single staple from the old upholstery.  THANK YOU DAD!  That was probably the hardest part of this makeover.  Once he removed the old fabric we realized that none of the foam or wood could be reused.  It was completely shot.  My dad took the plywood to Lowe’s and they custom cut two new pieces for us.  He then went to Hobby Lobby to pick up new foam.  We quickly got to work replacing the entire seat.  It is so much more comfortable and sturdy now.  I added a decorative trim around the fabric to hide the nails and give it a little more pizazz.  I just love the way it turned out.  What a difference some paint and new fabric can make.  My oldest daughter is trying to hijack this piece for her room.  I need to sell it while she is at school:-)   I think it would be great as a bench in a living room or entry way.  It would be perfect in a mud room as well.  Just adorable.  Right now it is sitting at the end of my daughters bed and it does look like it belongs there.  🙂  If it doesn’t sell I know it was meant to be right where it sits now.

Settee new settee 3 Settee 2 settee seat

Hope Chest Makeover

We all have them. . . the old hope chest we either inherited from a family relative or that were gifted to us in our teens.  A friend (Deana), I met online asked me if there was anything we could do to update an old hope chest of hers.  She referred to another I had sold about a month earlier.

chest finish

Deana really liked the chevron pattern on top and asked if I could do the same to her chest.  Unfortunately her hope chest was a little different.  It had a fabric top.  I was pretty certain that the wood underneath would be “unfinished” but thought we could just recover with a cheveron fabric.

deana top deana side Deana chest before

I got to work on this chest by cleaning it and detaching the fabric top.  It was screwed in to the top of the chest with 8 screws.

I started painting the chest keeping the other grey and white one in mind.  I used the same colors (Annie Sloan Pure White and Paris Grey) and asked Deana if she wanted it aged and distressed just like the one she liked.  She said yes so I got to work on the fun part…..beating up the furniture a bit.  🙂

Next I went upholstery shopping.  I sent Deana several samples but in the end we knew we wanted the grey and white chevron.

Once the staples were removed, I measured the fabric and used the original fabric as my template.  I was able to use the original foam as well.  It was still in great shape.  Using a heavy duty staple gun, I attached the fabric to the original board.

deana recover

deana top finish deana finish top

Finally I waxed the chest using Shabby Paints Vax and using Annie Sloan dark wax for aging.

deana finish

I have to say the best part was delivering this chest back to Deana.  I am always nervous when a person entrusts a piece of furntiture to me.  The look on Deana’s face and her reaction made my day.  Most excited about my new friendship with Deana….she is so sweet and shares my passion for all things repurposed.  We were “texting buddies” for sure during this process.  Deana kept sending other pieces around her house asking if we could make those over as well.  And let me just say, she has GREAT ideas and fabulous taste!  How gorgeous is Deana??

deana

A before and after of this chest back home!

deana before after

What do you think?  Do you have an old hope chest like this?  If so please share your makeovers.

Goodwill table turned Dollhouse chest


I picked up this little table last week at Goodwill.  I just loved the legs and the design on the drawers.  I knew with some paint and new hardware, it could be so beautiful.  My daughters thought it was the ugliest table they had ever seen.  I wish I had taken a before picture but I totally forgot. 

I decided to turn it into a Dollhouse chest.  It has two huge drawers for storing toys.  I went to one of my favorite local shops to pick up some paint.  I used Van Gogh’s First Kiss (pink) and Maison Blanche’s Magnolia (While).  After applying two coats of each I started work on the French stenciling.  This part was a little tough because I had these strips of French sayings.  After I would paint one, I would have to wait for the paint to dry, move it down and paint the next verse.  The drying part is what slowed the process down.  Once the stencil was applied I taped off the edges of the top and put a grey border all the way around.  I added a pink stripe towards the bottom and one along the top.  Next came the distressing.  I only lightly distressed this piece.

After sanding and cleaning the table off I applied two coats of Shabby Paints Vax.  This is one of my favorite products.  It is so easy to apply and requires no buffing.  It is also VERY durable. 

Now my daughters all love this table and are begging to have it placed in their rooms.  So sorry girls!  You didn’t love me when I was ugly, so I must find a new home:-)

doll house 7 Doll house table 2 doll house table 3 doll house table 4 doll house table 6 Doll house table


A Place to Store Paint

Sister Kim came to visit this weekend.  After seeing cans of paint, brushes, stencils, stain and other painting paraphernalia, she decided she had to find an accessible place for me to store paint.  She shopped around a bit in the garage and set her eyes on this ugly Goodwill find I picked up for  $12.50.

10594300_10203019592104618_772624481_o 10571513_10203019589104543_1534104580_o 10585114_10203019591424601_42406470_o

I love to paint in my garage but store my paint in the basement.  Needless to say when I paint, cans rarely make their way back down there.  Kim decided we had to keep them somewhere that I would actually put them away.  So we painted this ugly little girl up to match my kitchen décor.  God knows I spend enough time in that room.

We painted the cabinet using The Real Milk Paint Co’s Yellow Rose and Maison Blanche Magnolia.

10586886_10203020545448451_988992091_o

After painting I applied Dark wax and distressed.  My favorite sister then applied a coat of Shabby Paints Vax (We LOVE this stuff).  No buffing required.  Kim then ran through the house collecting various paint supplies strewn all about and began filling this little cabinet up.

10594310_10203020536488227_1474122292_o 10586836_10203020484926938_1852481747_o 10581276_10203020485086942_1407306628_n 10577991_10203020540928338_559743629_o 10589428_10203020447966014_414381723_o

I’m seeing Coastal Blue

I recently took on a job for a client named Sarah.  She was looking for something to go in her entry way, perhaps a chest or bench.  As most of you know I am a regular on Craigslist, so when I ran across thiss beauty I knew it would be perfect for her space.  I sent Sarah a picture and she loved it as well.

Entry way chest before

After I bought it, I met with Sarah at her home. She has a vision and I wanted to really capture that for her.  The entrance to her beautiful home is a gorgeous gray color.  We sat and talked about what she was looking to do.  Sarah mentioned that she would love to tie some navy into her color scheme.  I have worked with many blues before but never navy.  I love navy but had just never painted anything  with it.  So I consulted with the best painters I know, and they turned me onto General Finishes Coastal Blue.  Can I just say, “This color is amazing!”  I really wanted a dark, dark navy, and this is it!  As I was leaving Sarah asked me if I could do something with the table she currently had in her entry way.  It is such a cute table, and I knew we could tie it all together by painting both pieces.

Black table before

We decided to use a bright white for contrast on both pieces.  Sarah was great, though, and gave me creative license to do whatever I thought would look nice:-)  I wanted to jazz up the table and do a stencil or a stripe.

Navy table 2


Stripe

navy table 3

I lightly distressed the white part of both pieces using a fine grit sandpaper.  I waxed both pieces using a clear wax.

chest 6

chest bottom chest 6

I am thinking these may look too nice in my house to send home?  Just kidding Sarah……enjoy your new entryway furniture!  Thank you for trusting me with these beauties:-)